Hello stranger.
It feels like forever since we last chatted, but I’m so glad we have a chance to catch up. Hmmm? Whats new?
BOOM.
Landscape.
WE FINALLY DID THIS SHIT.
After years of procrastination, a few false starts and multiple plans, we finally got it together enough to rip out the grass (aka weeds) and put in something low maintenance and much more drought friendly. In case you hadn’t heard, California is basically drying up and turning to dust and is desperate for people to conserve what little water is left. We applied for a residential turf removal rebate through SoCal Water$mart which is a super great program. It was easy to apply and we ended up receiving $2 a square foot to install a California friendly landscape. If you’re in SoCal, do it. Then you’ll enjoy felling superior and judging every neighbor who still has grass while you have a sweet new landscape and a nice check from the government because of it.
So lets time travel to those long ago days of 2011-ish to see what the landscape was looking like…
BEFORE
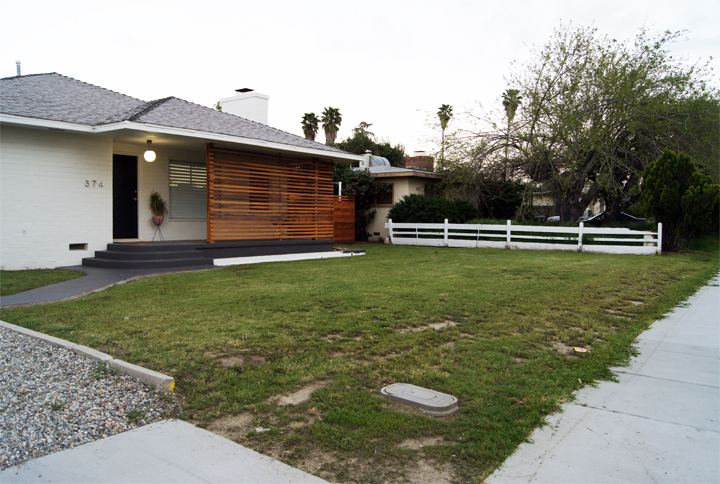
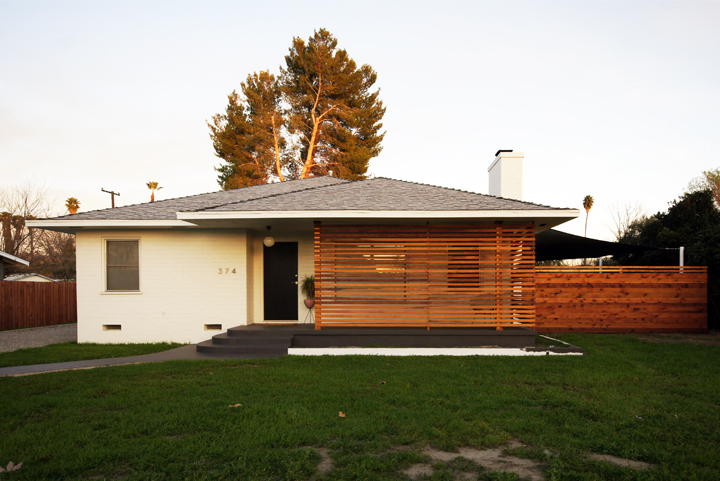
Blah.
Screw you weedy problematic grass. You were the worst and such a pain in the ass to rip out by hand. I never want to look at another action hoe again.
What did things look like during the whole landscaping process? Basically? Horrible.
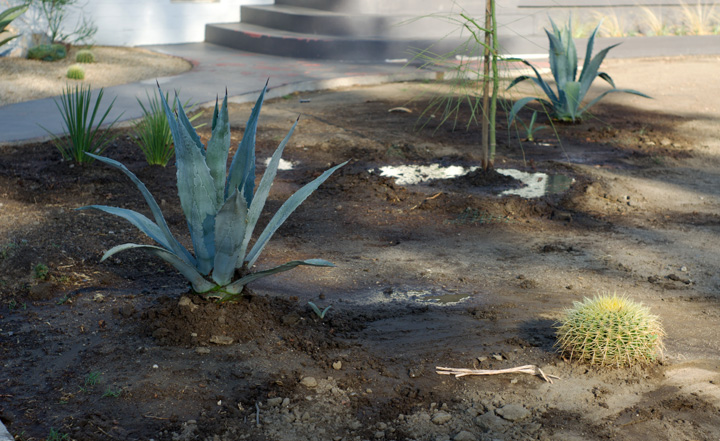
This is about the only photo I have during the process. It took us about four months to rip out the grass, level the yard and plant the first few tiny plants. Since we were doing this DIY style and only a few sections at a time, for many many months it looked like the crazy random cactus dirt yard and neighbors gave us the stink eye or would bring by a random pity cactus or two. I swore I had a plan! These things take time!
We ended up doing everything ourselves and as low cost as possible, like hand shoveling 15 tons of DG that we would buy and transport in our truck one half load at a time or grabbing any sizable rock that we saw on the side of the road in a dirt field. FYI – rocks are crazy heavy and those nice big landscape boulders are crazy expensive to buy and get delivered – so the size of the rocks throughout the landscape represent the maximum amount we could physically lift.
Rocks. You bastards.
Overall things stayed terrible looking for the next six months as we added more plants plus our “found” rocks and section by section of a finishing layer of “Palm Springs Gold” decomposed granite (aka DG).
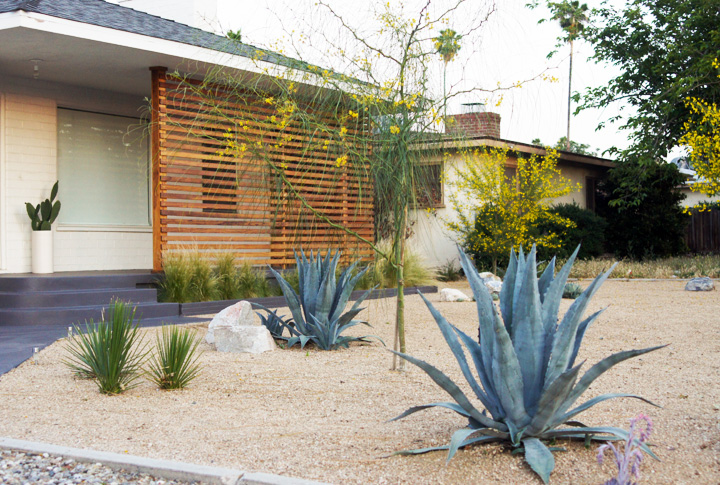
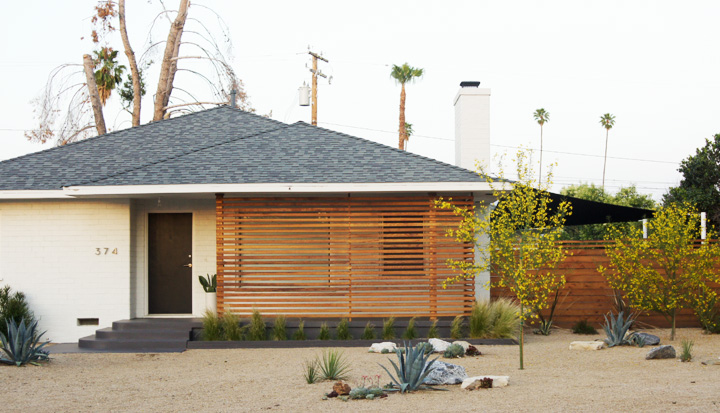
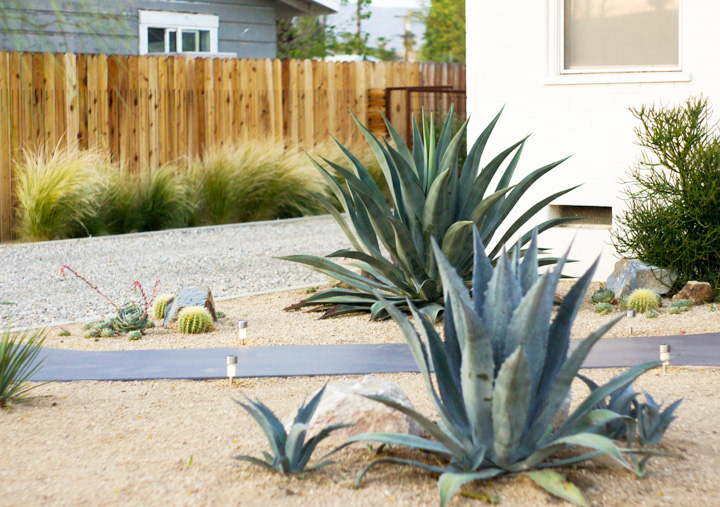
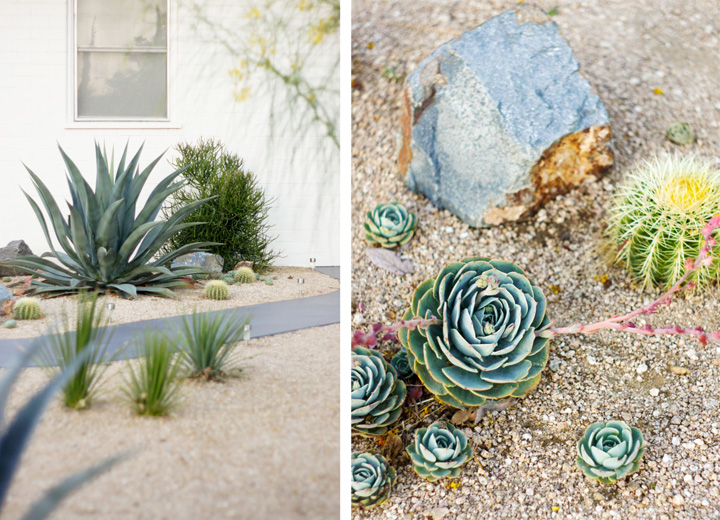
About a year later and here things are.
The plants are still growing and haven’t reached their mature sizes and we’ve been adding a few plants or propagate succulents here and there to start the process of filling things in. We still need to install the walkway from the front door to the street/mailbox, so excuse the random looking empty area in the middle. I’m working on it. You know…this thing is a process?
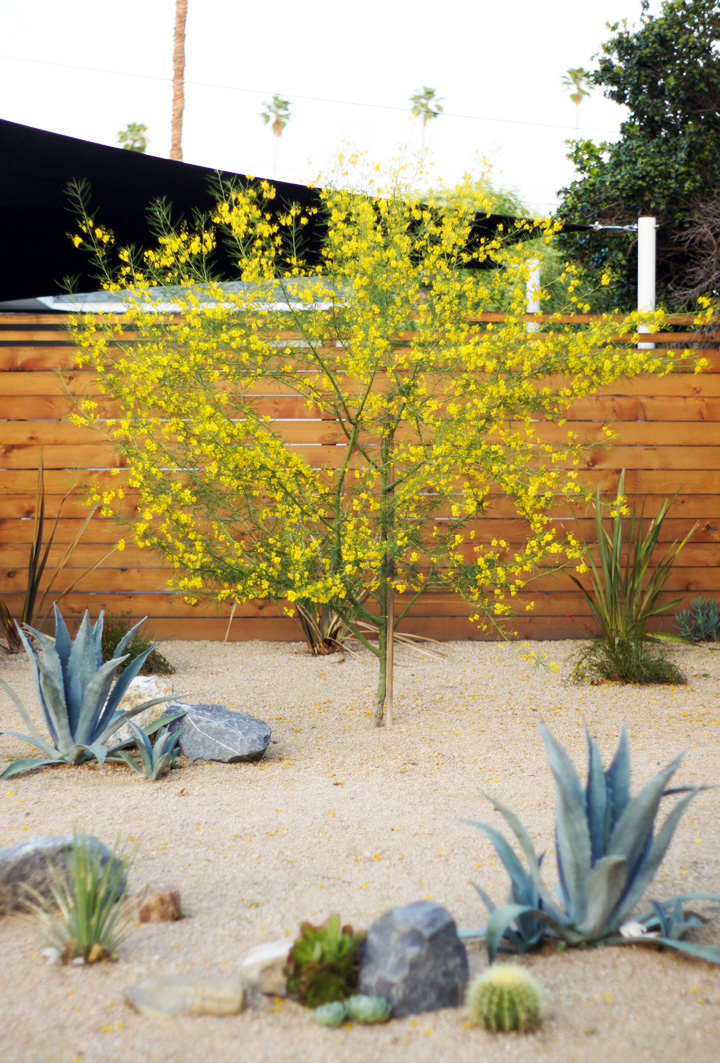
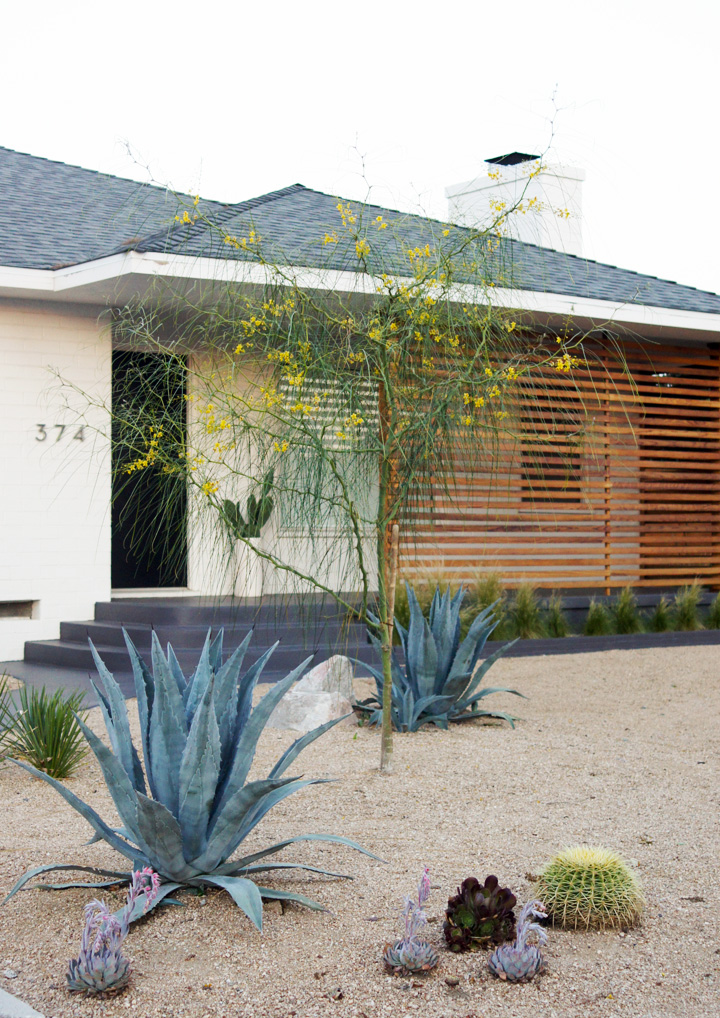
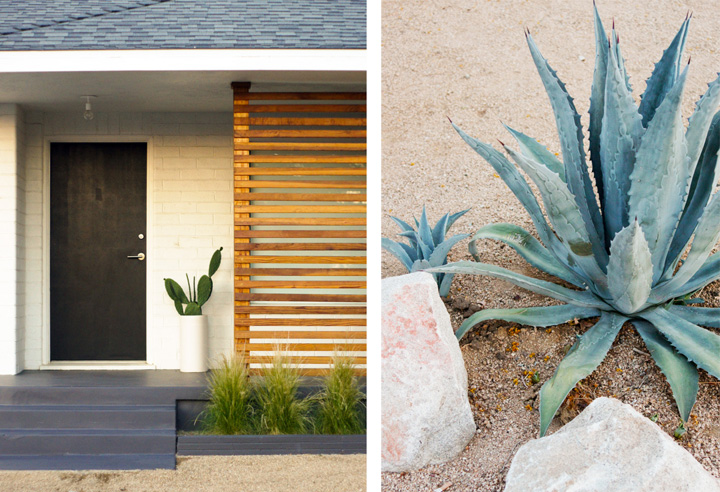
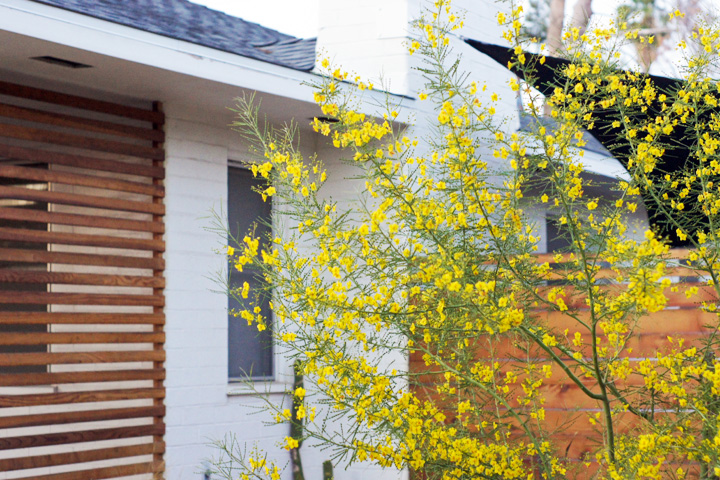
Well, the above Palo Verde was basically a stick with three leaves when we bought it from a landscape guy for $20. We planned on planting three Desert Museum Palo Verdes to create an overall sparse canopy in front of the house, but turns out its surprisingly hard to find these locally and they would range in price from $60 to over $400. So this scraggly boy grew up and turned out not to be a Desert Museum. Whoops. But we do have two DM’s we found at an out of the way Home Depot which hopefully all will blend in well together.
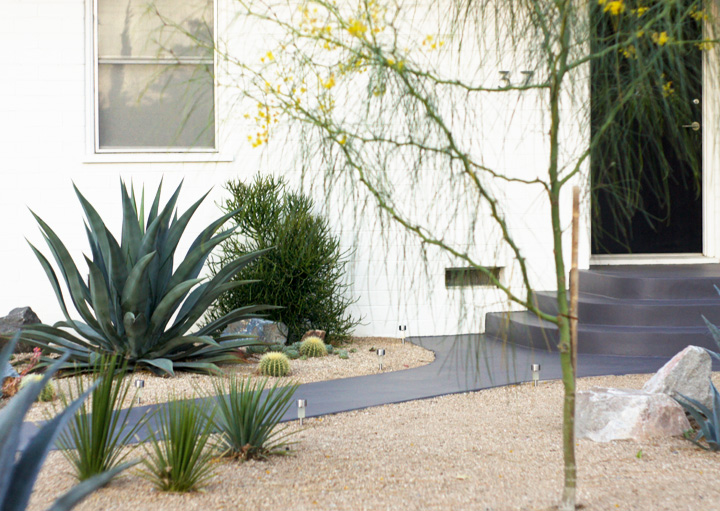
Hedgehog Agave, found at the most shameful of all places, WalMart, for $6. I love these things and couldn’t find them anywhere else and ended up buying their entire stock of like seven plants. I want more and now they are a ghost who never gets restocked. Gone but not forgotten.
Those before mentioned Desert Museum Palo Verde’s had their first bloom. So pretty.
Get bigger you jerks.
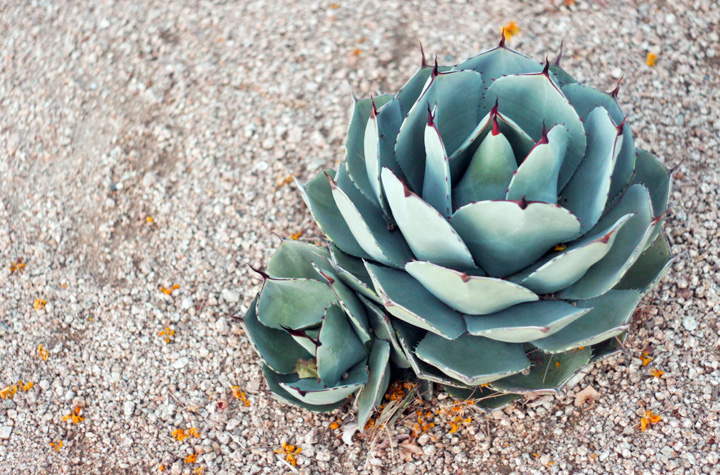
Artichoke Agave, it combines my two favorite things – artichokes and indestructible plants. It grows soooooo slow, but we randomly found a few at Lowes in the houseplant section for $17. I keep looking for more but they are always pretty pricey when I find them.
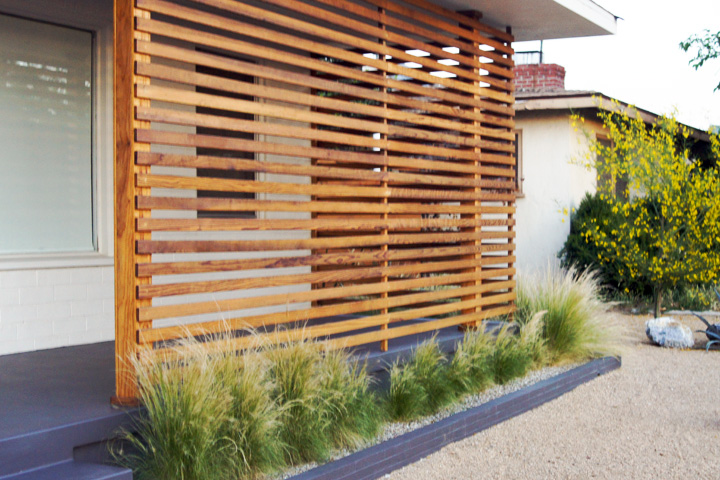
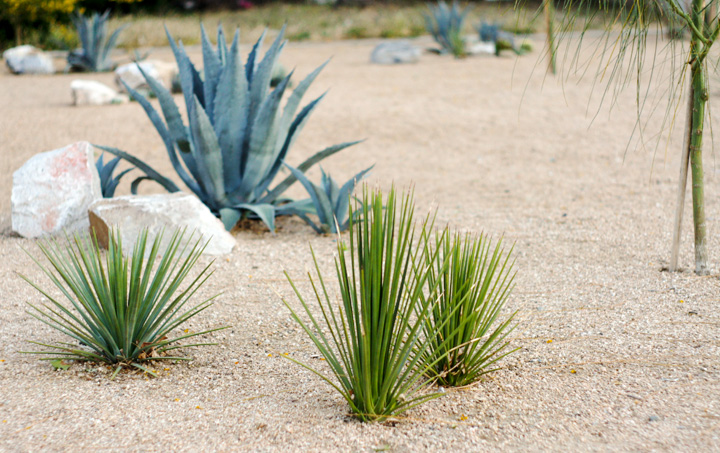
Mexican Feather Grass, oh no! People hate it because it is invasive, people love it because it looks amazing and needs very little water or maintenance. I’m on the love side for my local environment and found it actually very difficult to get established. Its so dry and hot here that the little baby grasses we would plant tended to shrivel up into crispy brown tumbleweeds. FYI – Lowes has a great dead plant return policy. We used it liberally.
It’s been about a year and some are still randomly small. I don’t know why since plants are a frustrating mystery. I keep hoping some seedlings might pop up in our neighbors random weed & trash yards, but so far no luck. We can’t even get them to grow little volunteers in our yard. I guess if your climate is less of a hard baked waterless hellhole like mine, these things might be pretty invasive.
Yes, there are so very many Blue Agave’s scattered throughout. We found this local wholesale nursery that the guys at the DG yard told us about, it has no name, its all cash and it has lots of Agaves for $10. I’ve found that these do really well in our terrible soil and horrible climate. They hurt to plant and will give you a poke once in awhile, but they are super low maintenance and now survive on rainwater. One problem is that they make tons of babies. I pull some of the babies off and plant them, some I put in pots, and some I throw into our compost.
Maybe we will make tequila with them some day.
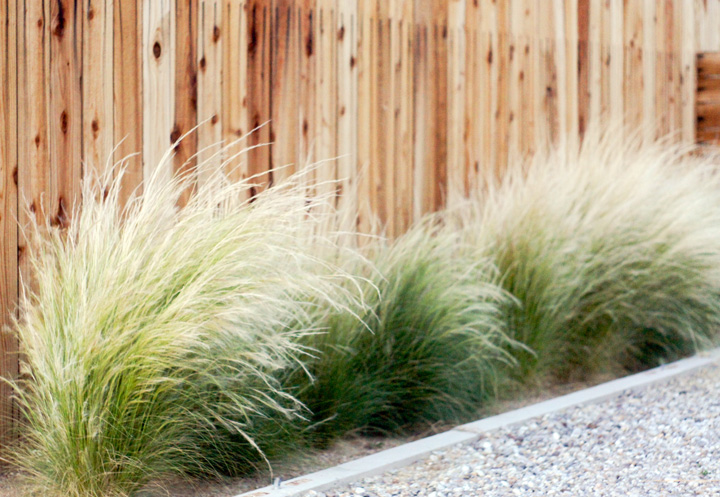
We have more feather grass along the driveway to help soften things up and disguise the ugly fence. Its the one thing the neighbors seem to approve of. Otherwise, everyone seems to disapprove or are pretty weary of all the cactus everywhere. I kind of enjoy threatening looking plants, less random weirdos wander up to the house and kids don’t ride their bikes across our front yard as much as they used to.

So yeah.
We finally did something with the yard.
We also fixed up the side yard, but have a few projects to finish back there that I’ll post about later. It will take some time for things to fill in and we still have to add the steps for the walkway and some more plants, but the landscape is basically installed. I decided to go for a more asymmetric and natural desert scape planting style to balance and soften all the hard geometric lines of the house. We kept the cost way down by doing it ourselves over a longer timeline and sourcing out affordable small plants and materials. We ended up spending about $1500 to landscape over 3000 sq.ft of our property and with the turf removal rebate came out way ahead of covering the cost for the entire project.
At first we watered the plants a few times a week to help get them established, but now, around a year later, we only need to water once a month during the hottest parts of the summer and then not at all during the rest of the year. I’m really happy with how easy everything is to maintain and am looking forward to see how it all will grow out and eventually mature (which is going to take forever).
FYI – cactus grows real slow even if you’re not real patient.


 , tweet us via th
  or get inspired by the