The Eames Chair Restoration Projects main objective is to restore and re-mount six wide mount Eames side shell chairs to six black Eiffel bases. We have the technology. They will be better, stronger, faster. More stylish.

I’m not the most patient DIY’er and find it difficult to stop and take pictures in the middle of working things out. I used the Chairfag restoration tutorial to help me through the process, and hope that this little DIY may help someone else.

This particular set of Eames chairs lived their previous life as school chairs – with desks attached and everything (therefore explaining the wide shock mount problem). There’s a lot of gum on the bottoms to prove it. Yum.
For the price (free) it was worth chipping that 1970’s gum off. Thanks Maya!

Here is the base of the chair with the wide mount shocks (and gum). What we need to do is remove them (both).

I used a hammer and sharp little flat head screw driver to gently knock off any surrounding epoxy and loosen the shock mount from the base.
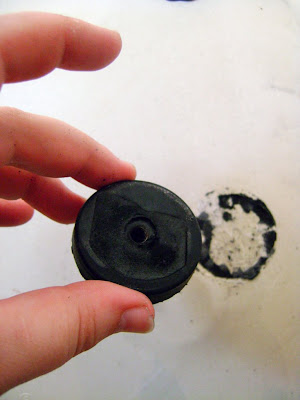
The shocks pop right off. Keep them for later.

Now that all the shocks are off, its time to get rid of the old epoxy.

I used a small hand sander with a medium grit paper to remove most of the leftover epoxy and then switched to a fine grit to complete the sanding.

Hooray! The epoxy is sanded off.

The fiberglass on all the chairs is worn and dirty from years of students abuse.
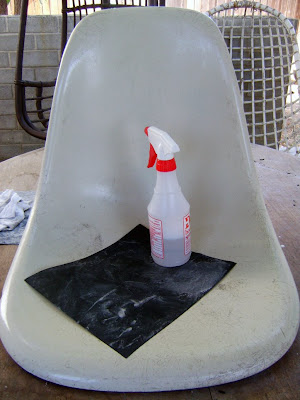
To bring the finish back and make them look like new wet sand each chair with the help of a spray bottle filled with water and a few drops of dish soap. I used a medium grit paper and then switched to a fine grit to finish up. Its easy and itchy!

After all the chairs are sanded to an awesomely smooth finish, hose them down with water and clean all the dust and gunk off. Let them air dry in a clean dust free area.

Penetrol is easily found in your local hardware store. Its an oil based product that seals and restores fiberglass. Wear gloves, this stuff can get sticky.

Use a lint free cloth soaked in the Penetrol to begin sealing the chair. Rub down the chair and massage the Penetrol gently into all its crevices.

These chairs are all oiled up and drying in a dust free area. It takes a little while for the Penetrol to cure…be patient. When I’ve restored other chairs I’ve usually done 2-3 coats of Penetrol to really get them sealed, restore the color and make them super sexy shiny.
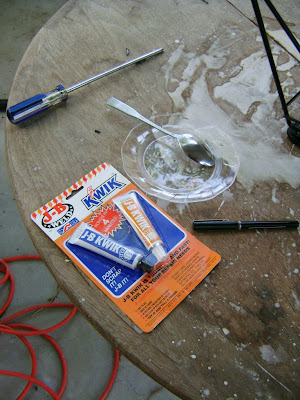
After the chairs have dried thoroughly its time to remount the shocks onto the narrow mount configuration. I used JB Kwik Weld Epoxy – which sets in about 4 minutes and is a nice color match to the original epoxy.

This cat’s cradle base was from another chair. I used it to create a template for the narrow mount shocks to be attached. I screwed the shock mounts on loosely and set them on the narrow mount flat areas already cast on the chair. I outlined them with a pen in order to quickly replace the mounts once the epoxy was applied.

Mix enough epoxy to create four quarter size dollops that go in the mounting areas that were just marked.

Attach the shock mounts to the epoxy. Do it quick! It sets up very fast.
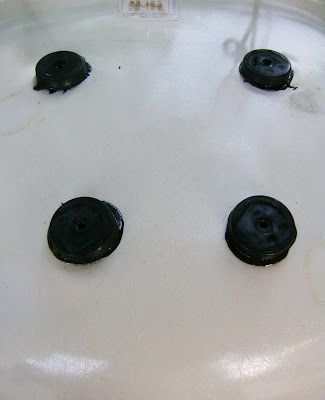
After about five minutes unscrew the base and leave the shock mounts to cure overnight. At that point they won’t slip around and just need some time overnight to completely cure. Then they will be ready for the base to be attached!

Repeat this six times, and you’ve got a dining set.
Next up…the big reveal!


