Archive for the ‘before’ Category

Guest Bedroom: The Run Down

Tuesday, November 10th, 2009


(AFTER)


(BEFORE) (like really before before, shot during our inspection)

The RUN DOWN

After we painted and reconstructed the guest bedroom wall it was time to style it all up. I bought two new things for the guest bedroom decorating extravaganza:

1. Enje white roller shades (3) from Ikea
2. White jersey sheets (on sale for $12.50!) at Target

Otherwise, everything else was lying around the house that we needed to decorate this bitch up. And I think I can prove it…

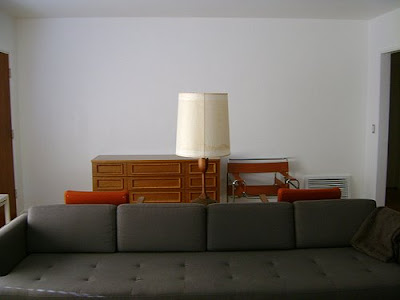
Hey, it’s the guest bedroom credenza hiding back behind the couch so very long ago. We bought this piece years before we ever moved to The Brick House. If memory serves it was found at a Salvation Army and was $60.

Wow, a really eye jarringly ugly and old version of the master bedroom. The Malou Ikea duvet set is now gracing the guest bed and the Ikea Vinstra bed frame was our first ever bed frame we owned.

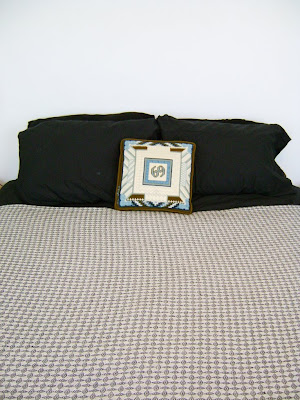
The Ikea Jorun blanket is still a favorite.

One of my $50 Craigslist cowhides is cozying up the floors.

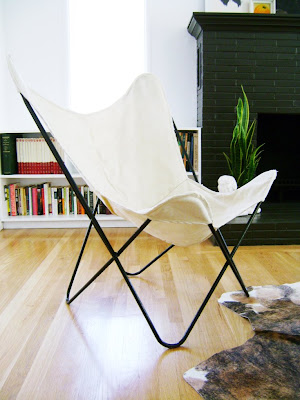
My first butterfly chair picked up at Angel View Thrift in Palm Springs.

The $40 Craigslist sputnik chandelier.

LinkLink

The $50 ebay brass Laurel lamp.

My free bubble lamp pendants.

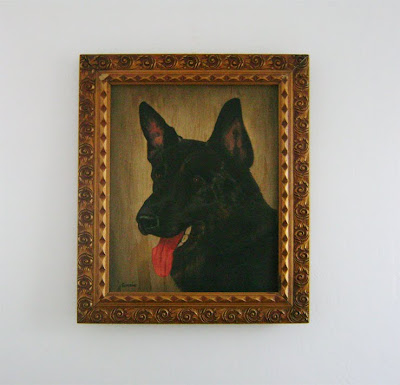
Ahhhh, Connie. I freed you of that horrid frame.
The kilim art is a painting as well…

I was going through all the old posts to find the pieces that ended up in the guest bedroom and realized that I never ever posted about this pair of tables I picked up. I found them months ago at a roadside estate sale and immediately shoved them into the guest bedroom where they languished away under piles of crap. Marked Lyon – Made in Denmark, they are teak and cost $50 for the pair.

Still to do:

-Closet door handles (custom)
-TV, Ugh.
-Alarm clock
-Headboard

Guest Bedroom Wall? Constructed? F*%k Yeah.

Friday, November 6th, 2009


This is the BEFORE before image of the guest bedroom taken during the house inspection. So many, many – many moons ago…

Gotta love the aluminum foil window treatment.

Little did we know that the wall would soon look like this:

And stayed looking that way until last month. Almost two years. We’re lazy.

Long story short, we had to remove a lot of crumbling water destroyed plaster to discover a big crack and no lathe. Poop.

We sealed the crack with mortar repair and then primed and Drylok‘d the interior and exterior masonry. BTW – that stuff smells horrid and is nar-sty to paint with.

Then we used 1/2″ furring strips at 16″ on center (F*ck you Holmes on Holmes. TV shouldn’t be educational) to frame out the wall to hang new 1/4″ drywall. We only had about 5/8″ to 3/4″ of depth to work with the remaining plaster, window and electrical framing.

It was a tight squeeze, and we weren’t about to make a novice attempt of throwing an inch of plaster on the whole wall. We got a quote of $1500 to have the pros do it.

We attached drywall and mudded the holes and seams with joint compound to make the wall flush and paint ready. Smooth and straight (mmmm hmmmm, thats what I like).

Here is the whole wall in it’s “ready to be painted” glory. The Boy was so proud, and remember he did it all.

OK, another tease sneak peek because the room’s not all the way finished and I’m so over showing pictures of that horrible green color. I mean come on – yuck – that green is hideous.

*Previous Owners you are put on notice. Bad, BAD P.O.’s! Did you see that horrible hanging pendant light? (It’s in the top right corner) Again, naughty P.O. bad, bad choice. Those are for kitchens.


Everything is white! Surprise surprise.

But look, it’s a real finished wall in a real guest bedroom – not just a grubby junk room, aka The Boy’s exploded closet. That’s a big deal for The Brick House.

Wall construction Run Down:

Pro:
Quote: $600 – $1500

DIY:
Materials: $150
Labor: $0

Rad.

Faux Brick

Tuesday, November 3rd, 2009


Before.


After!


(In progress with wood patch and Drylok paint)


After.

The Boy ended up resolving the large mailbox hole issue by inserting and affixing a large chunk of wood in the hole and painting it with Drylok. Then he hand sculpted a faux brick (with mortar lines and everything) out of cement patch.

Now we just need to seal it with our exterior mortar sealer / primer and paint the entire exterior of the house. But first we have to decide on an exterior color.

He also drywalled and mudded the interior wall to close that big scary gap. Hooray! It’s a solid wall again.

BTW: It’s already painted. (As is most of the guest bedroom)…oh no, the suspense…