Okay folks, this here is a new venture around the old Brick House, so put on your comfy pants and settle in as we ease into this thang. For the past few years I’ve been getting a number of emails each week asking for design advice, asking for help identifying/locating vintage furniture, asking about DIY projects and asking for product suggestions. I know, crazy! It’s super fun helping out where I can, but also super time consuming. Normally I answered as best (and quickly) as I could, but never really had a chance to answer in depth.
Now is the era of consulting in depth.
Welcome to Brick House Design – Modern design for frugal folks. (just like yyyyyyyoooooouuuuu)
For the next few weeks I’m going to roll out some projects I’ve been working on with some super cool folks. Lets ease into this whole BHD transition; should be fun times. Okay, lets get cracking!

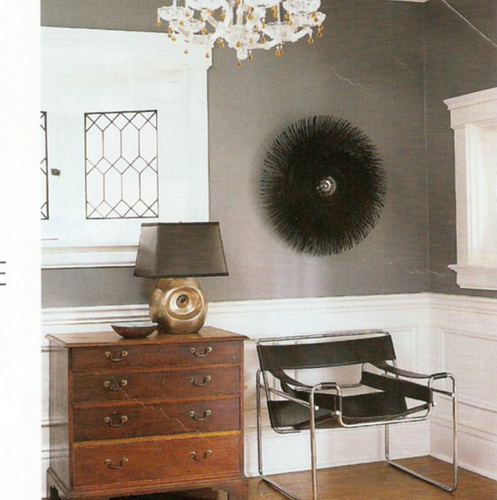
Britt and Ryan from Cucumbersome recently moved into a very contemporary live/work space and are a bit bewildered by the modern elements and are not sure how to address the platformed bedroom to make it warm, homey and comfortable. They love vintage, they like modern and they aren’t afraid to use color. Check out the office:

Love that dark wall and over sized photo!
For a a little more context here is the living room:

Nice sofa, great pouf, snazzy art and a fun rug. Getting a feel for their style (love the floors, I’m all about modern modern modern floors)
Let’s discuss the area in need. Welcome to the bedroom:

Like most of us, they don’t have a gazillion dollars to spend on tricking out the bedroom. They wanted some design solutions for addressing this small space, keeping it affordable and having it be cohesive with the rest of the apartment.
On the list of things to keep:
-Dark Brown Malm Bedframe
-Dwell Studio Draper Stripe Ash Duvet Set
On the list of things to address:
-Lighting
-Nightstands
-Storage
-Privacy
-Room darkening
The Floor Plan:

It’s a tight squeeze.

Above is the finalized mood board (BTW, I hate the term mood board, lets figure out a better word. Oh, also blog.)
1 | Custom built night stands. 4x4x4” wood blocks stack in three row grid. White painted top for finish
2 | CB2 Hinge Sconce (Pair)
3 | Ikea Aspvik Wall Unit
4 | “Deep Space” Benjamin Moore 2125-20 (same as office)
5 | Light grey wool army blanket
6 | Dwell Studio Draper Stripe Ash Duvet Set
7 | Ikea Flokati Rug, 6 ‘ 7 ” x 4 ‘ 7 “
8 | Custom 1/2” galvanized plumbing conduit curtain rod, two flanges, matte black paint
9 | Ikea Merete bleached curtain pair
10 | Vintage Herati Rug, 5’ x 8’
11 | Vintage PH Snowball / Poul Henningsen inspired Danish ceiling light
12 | Ikea Enje Roller Shade, Dark Gray
These are the elements I recommend to add to the space to pull the look together. In order for Britt and Ryan to better visualize how the final look will come together I created a sketchup model using the dimensions and images they provided.

They already have curtains installed to close off the bedroom and give a little privacy from the rest of the apartment. I recommended they build a custom curtain rod and use the heavier bleached Merete curtains from Ikea to create an extra wall for privacy or pushed back unobtrusively when they don’t.

I kept what they have with the Malm bedframe and DwellStudio bedding and added a Flokati throw on the end of the bed for that comfy and warm texture. I also added a 5′ x 8′ Herati Rug to the floor to warm it up, bring in a bit of eclectic flair and help break up the wooden floors. The main colors for the rug should be red, navy blue or black, some cream and maybe a bit of yellow. You can find rugs like these in a number of places at reasonable prices. Check Ebay, Craigslist, Overstock.com, Consignment stores, Import stores, even Ikea.

For the wall behind the bed I brought over the dark gray office wall color (Deep Space – Benjamin Moore 2125-20). They had leftover paint and bringing the color to the hidden bedroom wall would establish continuity with the rest of the apartment and help darken the room for those bright mornings (when a little sleeping in would be nice). I also added a dark gray Enje roller shade to also address the room darkening they asked for, for just such occasions.

The Ikea Aspvik wall unit is normally used for offces, but it is shallow enough and the width small enough that it can fit nicely in the tight space at the end of the bed. The wall unit allows for some extra storage as well as a nice place to lean some more art or vignette up some collectibles. Because the doors slide instead of open outward that feature helps with the space saving. Keeping it white against the white wall will allow the space to still feel open and since it is floating without legs that keeps things nice and airy. It’s a great little wall unit and not outrageously expensive.
I included a painting by Joshua Abelow on top of the Aspvik. Why? Well, I just really like his work and think Britt and Ryan have a nice art collection going and could add something super interesting in that area.

They have a hardwired ceiling light connection (that is not currently in use) in the back left corner of the room. I recommended they find a vintage light inspired by Poul Henningsen’s PH Snowball. Snowball lights are crazy expensive, but you can invest a little, find something similar, go a little different, or maybe a lot different. Round, angular and white. Keep your eyes peeled because that’s the thing with vintage – you might have to do some footwork and be patient, but there is stuff out there. Flea Markets, Thrift stores, Vintage stores (I got a similar light HERE), or Ebay if you get desperate.

For the tight space next to the bed I recommended the CB2 Hinge Sconce. Keeping them dark gray like the wall makes things monochromatic, which in a small tight space like this can help with the feeling of openness that is difficult to achieve. They are also plug-ins, and since there is no hardwired spots next to the bed, they would be super easy to install.
There are three major DIY projects to get the look and keep costs down:
-Upholstering the Malm headboard with a light grey wool. Check out THIS for inspiration
-Building the wood block nightstand. THIS was the image that inspired that idea.
-Installing the custom curtain rod. I love plumbing pipe, and am doing a similar project right now.
I’ve discussed with them how to do these three projects if they choose. They aren’t super complicated and can be done easily with supplies from the local Home Depot type store if you are willing to get a little DIY. Sometimes getting creative and reusing items you have in new ways is more cost effective and unique than buying everything brand new.
You can check out the final PDF that outlines the plan and is the culmination of working back and forth with Britt and Ryan, in order to address their needs and budget. Thank you guys, I had a ton of fun! Check out the great projects at Cucumbersome. Very nice.
__________________________________________________________________________________________________
Did you get through it? That was a lot of words and ideas, much more than a typical Brick House post. Whew. We made it.
Designing is obviously complicated.
If you have a space, big or small and need some design consultation and advice please email me at contact@the-brick-house.com to discuss solutions for all your decor dilemmas. Depending on your budget and the scope of your project, a quote for services ranging from 3-D rendering, mood boarding, product sourcing, or actual physical shopping can be arranged.
Brick House Design is a next step, folks. Can you smell it? The excitement? I’m excited.
xoxoxo
Morgan


