Thrifty!

January 12th, 2010

DSC06701 DSC06716

DSC06705

I’ve been on the hunt for a new coffee table for the den for a long while. We’ve gone through multiple coffee tables (for a recap let’s time travel to here, here, here, here, here, and here.)

Most recently we used a pair of John Keal for Brown Saltman end tables (just like these on fancy 1st dibs) that worked adequately but never really made me happy.

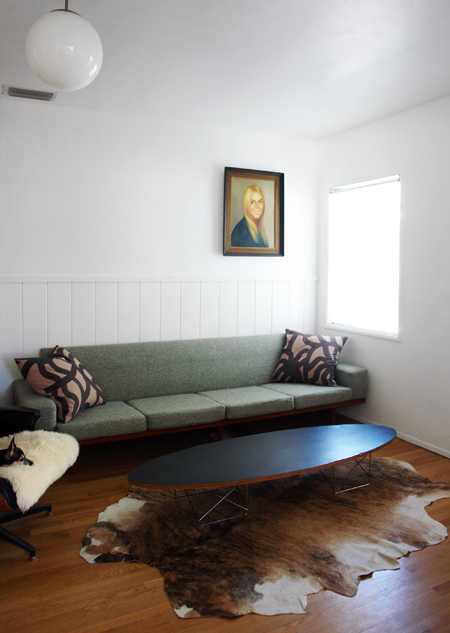
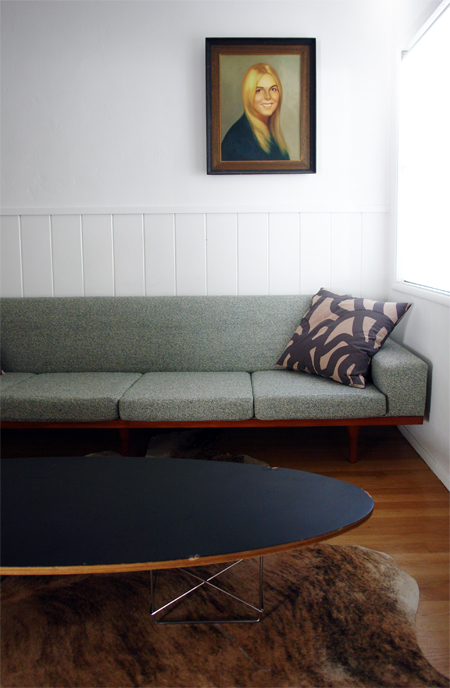
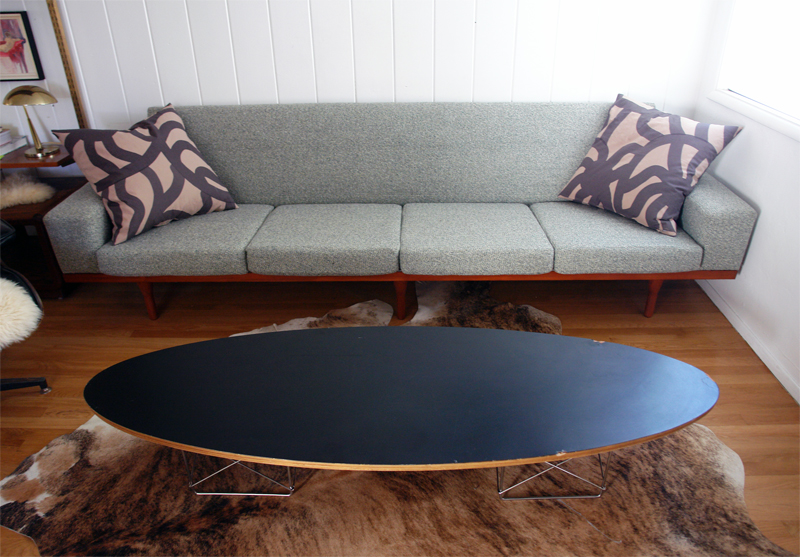
This weekend I found a pretty beat up Eames elliptical table at this place called Foothill 5 Fifty.

This place is not for the faint of heart, well…pretty much its just plain awful. The store is seriously packed with amazing pieces of furniture (all the biggies – Eames, Nelson, Bertoia, Wegner, Nakashima, you name it they got it stuffed in there – like crazy hoarder style) but it’s almost impossible to move around and you can’t see anything. When I’m feeling particularly masochistic I tend to check it out.

Customer service? TERRIBLE. Prices? OUTRAGEOUS.

So, my little beat up table was $90. I like it, Iggy loves it, The Boy, well he’s not convinced. You gotta get low low low low low low low low

Patio Walkway

January 11th, 2010

DSC06583

Figured out today that we are stupid, like really stupid.

I blame it on inexperience, but logically if your going to create a gridded cement paver patio it would be wise to level the area, put down sand and install the pavers first.

Maybe it’s just project fatigue. We also drove to Home Depot in my little Scion to pick up 10′ lengths of wood and 30 super heavy cinder blocks. Once we loaded up the cart we realized we had to drive back home and get The Boys truck.

We Are Idiots.

DSC06603

The whole plan was to create a 18 x 18′ gridded cement paver patio around the fire pit with gravel as a filler. It would have been smarter to install those f*cking pavers first but somehow we got gravel happy and thought we needed to level out the area with gravel. Dumb move.

I installed the first row of stepping stones behind the garage today and it required digging out each individual spot, leveling and finessing each stone in a rocky pit of hell, and cursing our own ineptness.

I do think it turned out rad considering the disgusting hamster bedding dog run of death that was there before.

We chose 18 x 18″ cement stepping stones that cost about $50 total.

DSC06608

Now we have to decide what to do:

– Leave it all gravel.
– Install 18 x 18″ pavers at $5 a piece.
– Install 12 x 12″ pavers at $1 a piece.

I’m leaning towards the 12 x 12″ pavers, even though initially I was super opposed to them (I had lofty dreams of like 30 x 30″ pavers till I found out how much they are and how fragile). The smaller ones are WAY easier to work with, could be installed closer together and would be about $150 compared to like $350 for the larger size.

Landscape Inspiration

January 8th, 2010

Loving D-Crain landscape design. LOVING! Which I found after lisa tomiko mentioned Rig Red Sun in Venice.

d-crain_0026_medium d-crain_35_medium

d-crain_90_medium

d-crain_110_medium d-crain_88_medium

d-crain_102_medium

d-crain_0018_medium d-crain_89_medium

d-crain_109_medium

Also, Jonathan Duke, owner of Austin Outdoor Studio chimed in with a good tip about that steel landscape edging:

Hey Guys,

I just thought I’d chime in and offer a little advice if I could. We use regular hot rolled steel for our edging jobs. We prefer to do everything in 1/4″ thick steel if not thicker. Corten is great for certain installations like commercial planter application to minimize the rusting. I don’t believe it is necessary for landscaping steel. You’d be suprised how long it takes for 1/4″ steel to rust through.

Here are some tips for having a local shop do it for you.

1.) You want to use steel that is atleast 1-2″ wider than the height you want out of the ground. This will help any washout problems that could happen. Hot Rolled steel is available in widths ranging from 1-12″ that are 20′ long. If you want talled than 12″ you will have to get full sheets fo steel sheared and then weld them together.

2.) The steel can be anchored to the ground in several ways. We use 5/8″ rebar for most edging installations, but other means for taller structures to get the support. The rebar stakes need to be pounded into the ground at least 18″ and then welded to steel edging. Tell the welder which side of the steel the stakes need to be welded on.(you shouldn’t be able to see them. Sometimes it is necesarry to weld angle iron to the back to get perfectly straight edging.

3.) The most important things to communicate to the welder is it must be straight, plumb and installed level if that is the look you are going for. Otherwise, what’s the point of paying the extra cost if it doesn’t look right.

4.) Edging takes longer than you might think to install properly and welder’s rates are not cheap, so keep that in mind if the shop wants to bill you by the hour.

Good luck and keep up the good work, its looking great!

Jonathan Duke
Owner
Austin Outdoor Studio

Hooray, professional tips! Thank you interweb!